Tuesday, December 20, 2011

Washer Jewelry

I am really excited about my most recent project.  I found the idea HERE.  It cost me under $5 to make all 3 necklaces and I think they turned out great!

Items needed:
1 small washer
1 larger washer (you pick the sizes you want)
white glue
Mod Podge (mine is homemade)
scrapbook paper of your choice
beads, jewel etc. to decorate
Cording for the necklace strap
(I also ended up using glitter puffy paint)
  Good old washers from the hardware store
I traced the washers on the back of the scrapbook paper so the lines wouldn't show. Making numerous circles ended up being in my cards because I needed extras to play around with and see what I liked best. 
Once you have the circles cut our glue them on the front of the washers.  When they are dry use your Mod Podge (equal parts white glue and water, mixed) to paint over top of the paper.  Put your smaller washer on top of the bigger one (I used extra white glue for this step just in case the mod podge wasn't strong enough.)  Then decorate as you wish. 
 Here is my homemade mod podge.  I used 1 tbsp. water 1 tbsp. white glue, knowing that this isn't something I'm going to use all the time.  I didn't even end up needing it, because while I was looking for a few things I found my glitter puffy paint and decided to use that in place of the mod podge.  It made a huge difference in the end result!  My girls are going to be so excited!

Monday, December 19, 2011

Christmas Ornaments

So, I decided this year for my kids' ornaments (they get a new one each year) we were going to make them!  And what's more fun than paint and hand prints?  Especially for the older kids that don't ever seem to do hand prints anymore!  HERE is where the idea came from.

 I didn't do what she said to do, just got the idea from her.  These are plastic ornaments from Micheal's  and I put fake snow in them.  Then each kid picked the color they wanted and we made hand prints.  I wasn't as organized as I had hoped because I forgot about the glitter until it was too late!  They turned out cute, but I think they need a little something, so I'm going to have to spice them up a bit later (I'll add pics when I do.)  And getting Bronx to do his (14 months) not such a success!  I think I'm going to try his again with a different color (lime green this time, something else next time.)  He really didn't want to open his hand and he hated the feeling of the paint! LOL!


Not super great pics because they were hanging to dry, but I'll get better ones later when I've added some fun to them!

Slow Cooker Lasagna!

I made this recipe once before and to me it was a bomb.  Justin said it was fine, but I thought it was flavorless and mushy.  So, HERE is where I got the recipe and this is what I did to make it yummy...

1 lb. ground beef
2 large cans Spaghetti sauce (26.5 oz. each) mine was garlic and onion flavored, but when I tasted it, you couldn't tell.
8 oz. package lasagna noodles uncooked
4 cups mozzarella cheese
2 cups cottage cheese (16 oz. container)
onion and garlic to season meat 

 Seasoning the meat in the original recipe was a side note, I feel it must be done!
I used about a half and onion and 1 tbsp. minced garlic, but to each their own on this, it just needs some flavor!  Once browned add the sauce.
 I forgot to take a pic with each layer, and then my flash wouldn't work :P
Spray with cooking oil and then put 1/4 the meat sauce in the bottom of the dish.
Layer 1/3 of the noodles to cover as best as possible.  Then mix up the cheeses and put 1/3 on top of noodles.
 Continue with this pattern until you end with meat sauce on top
 Cook on low for 3 hours
 Let stand 10 to 20 minutes (with lid off) to set.
Enjoy! 

*Note, I am using a 7 quart slow cooker, so that is why I ended up needing so much sauce!  Next time I will use my smaller slow cooker to do this, because we didn't even eat half.  But, this time it was yummy because I didn't use tomato sauce like the original recipe said and I cooked it less time and used a lot more seasonings.  So to do a smaller batch I'd say 1 can of spaghetti sauce would do, but have an extra one on hand just in case.

Friday, December 16, 2011

Chicken n Dumplings in the Slow Cooker

This is one of our new favorite recipes for the slow cooker!  It's so good that I'm going to have to double it for my big family so that we actually have some leftovers!  YUM!  I found the recipe HERE.  That recipe calls for the grands flaky refrigerator biscuits, but those aren't in my budget and I don't really care for them to begin with, so here is what I did. 


Total cooking time 4 hours on high (the original recipe calls for 4-6 hours on high, but I find that the chicken is dry if you cook it that long.)
2-3 Large boneless skinless chicken breasts 
2 tablespoons butter
2 cans cream of chicken soup
1 can chicken broth (I always use water and chicken bullion because it's cheaper and easier on my storage space.)
1 onion diced
1 tablespoon dried parsley
1-2 cups frozen veggies (we always add extra peas, yum!)
Dumplings:
2 cups Bisquick (I would have used my Jiffy Mix, but I was out.)
1/2 cup Milk
Mix Bisquick and milk together to form dough.  Powder your hands with some Bisquick flour and roll out dumplings.  I usually make mine about the size of a small bouncy ball.  I make them ahead and put them in the fridge just so that when it's time to put them in they are ready.

 Put the chicken in the bottom of the slow cooker and the butter on top (I was doubling it, but it ended up being too much chicken)
 Pour the cream of chicken soup and chicken broth on top
 Add the veggies and mix a bit and cook on high for 3 1/2 hours
 Shred the chicken then...
 Add the dumplings
After I put the dumplings in I try to cover them with sauce.  (these look extra big because they start to expand right away, but I made them about the size of a small bouncy ball.)  Place the lid back on for 30 minutes and serve.

Thursday, December 15, 2011

Cheesy Vegetable Chower

I found this recipe HERE.  It took me about an hour and half to make including all the chopping.  It was a huge hit!  We love creamy soups in our family!


2 Tablespoons butter
1/2 cup chopped onion
1 cup finely chopped carrot
1 stalk celery, finely chopped (feel free to add more celery if you like celery; I don't, so I don't add much)
1 Tablespoon minced garlic
4 cups chicken broth (I usually use a mixture of low-sodium chicken broth and broth made with chicken soup base because it gives it such nice flavor)
2 large baking potatoes, peeled and chopped
1 Tablespoon flour
1/2 cup water
2/3 cup milk
2 cups chopped broccoli
2 heaping cups shredded cheddar cheese

Melt the butter in a large soup pot.  Add onions, carrots, and celery and saute over medium heat until tender.  Add garlic and cook 1 or 2 additional minutes.  Add chicken broth and potatoes, bring to a boil, and cook until potatoes are tender.  Mix flour with water, add, and simmer until soup is slightly thickened.  Add milk and broccoli and cook until broccoli is just tender and soup is heated through.  Stir in cheese, allow to melt, and serve.


Veggies in butter, yum!
Veggies after the broth was added.
After the flour mixture and milk were added it started to look more like a creamy soup, but it still wasn't thickening like I thought it should.  My potatoes ended up getting overly done (which I love) because I had to let the soup boil for so long trying to get it to thicken.  Then I added the cheese, which helped, but not as much as I would have liked.  I thought maybe when I cooled it would thicken.  It did a little.  Anyway, it was yummy and my 2 year old went back for seconds!  That's huge since getting her to eat anything is hard!

Wednesday, December 14, 2011

Marble Maze


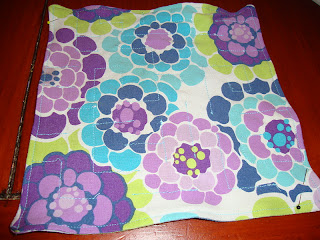
I saw THIS marble maze on Pinterest and thought it would make a perfect addition to our Church bag.  But of course I need one for each kid!  I wanted to do it out of a stretchy material, but I didn't want to buy any.  One day it dawned on me to take some of the clothes I was going to donate and use them as material!  FREE!  YAY!  The only thing I will do differently with the next one is sewing on the circles (start and finish marks) first before sewing the 2 sides together.  I now have to figure out what I am going to use for the start and finish because I forgot to do it ahead.
First off I sat down and drew out a maze.  It really wasn't too hard.  I made all 3 different so that they wouldn't get boring.  Then I cut out the material about 1/2 inch bigger than the maze on each side.
I sewed the squares right sides together leaving an opening so I could turn it right side out.  (like you would sewing a pillow.)  I ironed the edges flat, put the marble inside, and then sewed all the way around the edge closing off that hole as I went.
 The material is bigger than the pattern, but that part you see is sewn so it's just an edge.  The sewed line lines up as best as I could with the pattern.
 Sewn edges
 If you look closely the material kinda stretched and became a bit wavy as I sewed it, but I really wanted it to be stretchy a bit so that I didn't have to be quite so accurate with my maze lines (I wanted the marble to be able to go through no matter what.)
 Pin the pattern on top
 Then sew on the lines through the paper.


 When I was done sewing all the lines (remember to back stitch each line so they don't come out) I tore the paper off.  This part I had to be extra careful and was the hardest part of the process (it's an easy project, so it wasn't that bad.)  I placed my finger on the stitching and pulled the other side of the paper like trying to tare a coupon!  Especially my Costco coupons that you have to do extra carefully!  Once you get one side pulled up the other side of the stitching comes quite easily.
 Finished lines!
See, a few of my maze trails were a bit tight, so I'm extra glad I used a stretchy material.  You can use a non stretchy material and it would be easier to sew with, but you'll have to make sure that the marble can get through!

Saturday, December 10, 2011

Snowman Ornaments

So, every year my friends and I do an ornament exchange.  We draw names out of a hat and secretly give an ornament to someone in the group.  I went looking for an ornament to give and was extremely disappointed!  Last year there were a ton of really cute ones and this year no one had any!  So, I decided to make one!  I found the idea HERE.  I think hers are cuter than mine, but I used what I had.

 The ornament is plastic, not glass (got them at Michael's,) then I put snow inside.  Cut the top of a baby sock off so I could get the ribbon through and hot glued the hat on.  I hand painted the face (where the girl from the other blog used a paint pen-I didn't have any.)  The hat needed a little something, so I painted snowflakes on. I like it, just wish I had a better selection for the hat!
 And after I sprayed it with glitter!  I have plenty from all of my girls dance recitals, so I just sprayed it on!  It just added a nice little touch, you can barely notice it, but it's just right. (glitter not pictured.)
See, I'm pinning, but actually doing!  That is my goal and so far, I think I'm doing a pretty good job! :)

Friday, December 9, 2011

Slow Cooker Creamy Chicken and Wild Rice Soup

 I made this soup last night.  Knowing my family and hoping it is super yummy I doubled it.  I had a small freak out right before serving realizing that I made A LOT of soup so if they didn't like it I was in big trouble!  I found the recipe HERE.
.
I of course changed it a bit, so here is MY version:
Cream Chicken and Wild Rice Soup
Ingredients:
4 cups water with 4 tsp. chicken bullion
1 cup water
2 boneless, skinless chicken breasts
1 package of Farm House long grain and wild rice (because my grocery store didn't have the Rice-a-Roni kind) 
1/2 tsp salt (plus more to taste)
1/2 tsp pepper
3/4 cup all purpose flour
1/2 cup butter
2 cups half and half 
1 cup grated carrots (I diced mine)
1 cup diced celery


Directions:


Combine broth, water, carrots, celery, chicken and rice (along with seasoning packet) in a large slow cooker. Cook on low for 6-8 hours or on high for 4 hours. 


Take out chicken and shred with two forks and then add back into slow cooker. In a small bowl combine salt, pepper, and flour. In medium saucepan over medium heat, melt butter. Stir in flour mixture by tablespoon to form a roux. Whisk in cream, a little at a time, until fully incorporated and smooth. Stir cream mixture into slow cooker and then let cook on low for 15 more minutes.  I ended up doing 3 hours 30 minutes on high, because I was low on time and knew that every time I do chicken in the slow cooker it gets over done.  I shredded it, added the roux and only ended up putting it back in for another 10 minutes.  My roux was a little extra thick because I only had 3 cups of half and half instead of 4 (I doubled the recipe remember.)  So, my soup turned out extra thick.


See how thick it is?  We loved it!  But, when I went to reheat it for my kids lunches today I had to add water!  If you don't want it so thick, use 2 cups of water instead of 1 and use all the half and half when making your roux. :)  It took some convincing to get my kids to try it, (see how hard my life is, lol) but, once they tried it they loved it!  I served it with cornbread! YUM!    

Thursday, December 8, 2011

Easy French Bread

I have made this recipe twice and both times were not successful.  I'm going to give it one more shot and then call the recipe done!  It calls for you to put the dough in a cold oven and turn it on.  I feel like this is where the recipe goes wrong.  Starting with the cold oven is supposed to allow time to rise as the oven is heating up, but since I have a new oven and it only takes 9 minutes to preheat, my bread is always coming out flat.  It tastes good, but flat bread is, well just that, flat!  I will try again allowing time to rise and then cook.  We shall see.  (I'll update this post as soon as I get a chance to try it again.)

Easy French Bread (HERE)
adapted from James Beard

1 1/2 T active dry yeast
2 cups warm water
2 T sugar
1 T salt
5 cups bread flour
1 T egg white plus 1 T water, mixed together in a small bowl.

In the bowl of an electric mixer, pour the warm water.  Add the yeast, sugar, and salt and mix with the dough hook until dissolved.  Add the flour and mix on low for 2 minutes and on medium high for 10 minutes.  The dough should be pulling away from the sides of the bowl.  Cover the mixer bowl with plastic wrap and let it rise for 1 1/2 hours. (I always spray the plastic wrap first so if the dough gets that high it doesn't stick to the plastic.)

Dump out the dough onto a lightly floured surface into 2 equal parts.  Shape each into long baguette and slash the tops with a serrated knife.  Brush with egg white mixture and place in a cold oven.  Turn the oven to 400F degrees.  Bake for 25-30 minutes, until golden brown.

Wednesday, December 7, 2011

Obsessed with the Crock Pot?

Well, no, not really, but I did try to do 30 days of Crock Pot meals.  Didn't turn out so great, cause we sure got sick of all the sauces etc.  I just wanted something dry for once! LOL!  I did however find some really awesome recipes and I'll share them here with you.  I still plan to do many crocking meals a week, since I have finally found some great recipes and time is limited on certain days!  Recipes to come...

Crochet Beanies!

This year I decided that Christmas was going to mostly be made instead of purchased.  So, I got started on my list.  My oldest daughter has a beanie much like this beanie, but we washed it and now it's kinda falling apart.  She was so upset, but continues to torture us with wearing it!  Mommy to the rescue!  Everyone is getting a beanie for Christmas!  Here's the first one I made.  I got the pattern HERE.  Then I added a single crochet all the way around the edge.  Lastly I added braids on the ends so that it was just like my oldest daughters beanie.  


 Good thing she's 2 and doesn't know this is for her for Christmas! Shhh!


 I felt like it needed a little something something, so I added THIS cute flower and wah lah!  It's done!


And this one is for my 5 year old.  I didn't feel like it needed anything, so I'm calling it done. :) 2 more to go...